Create custom materials by adjusting style and properties directly—perfect for making unique looks not in the Library.
Material Style
When creating new materials in the Material manager, you specify the desired style.
If you need to change the style, select it again in the Property after choosing.
Matt : Matte materials such as plastic, clay, asphalt, rubber, and paper.
Glossy : Glossy materials like marble, concrete, ceramic, enamel, and paint.
Metal : Metallic materials like gold, platinum, and automotive paint.
Transparent : Transparent materials such as glass, acrylic, plastic, and liquids.
Neon : Illuminating materials like neon signs, lights, and LEDs.
Custom : Create a new material by manually adjusting all settings.

Color & Image
Click on the Color icon to change the color or add an image.
Choose one of the three color profiles: HSV(default), RGB, Hex,
then select a color from the Color swatches or enter a color value.

In the Image tab, you can load an image file from your local storage.
After loading the image, adjust the Tiling value to add patterns, and click the delete icon to remove the image.

Advanced Material Properties
You can adjust various options to give different effects to the material. Modify the values for each option or add background images to achieve additional texture effects.
If needed, you can add options through Add advanced properties.
Note that the types of options you can add may vary depending on the style.
Roughness
Adjusts the roughness and glossiness of the material's surface.
Base Style : Matt
Value 0: Smoother surfaceValue 1: Rougher surface

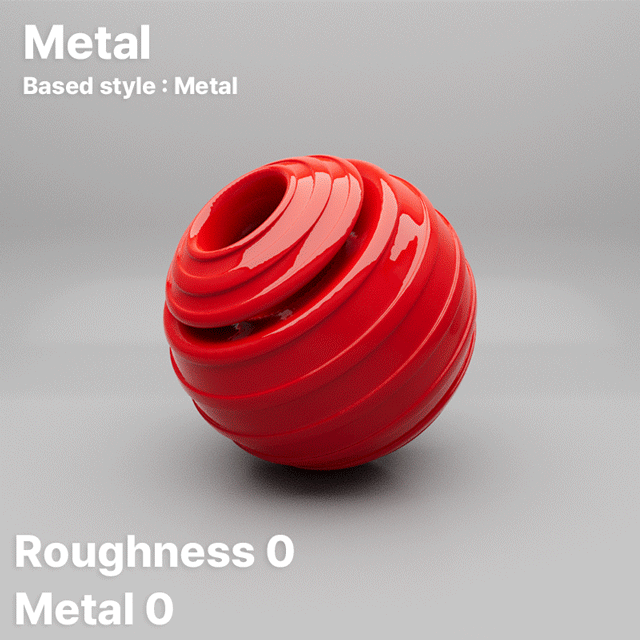
Metal
Adds a metallic surface to the model. Adjust the Roughness value alongside it to achieve various textures.
Base Style : Metal
Value 0: None metallicValue 1: Metallic
Refractive Index
Adjusts the degree to which light is refracted as it passes through the model.
A lower value allows light to pass through in a straight line, while a higher value increases the refraction angle,
making it harder for light to pass through.

Below are examples of objects based on different Refractive Index values:
Base Style : Transparent
Value 1: Air or VacuumValue 1.33: WaterValue 1.5: GlassValue 2.42: DimondValue 8: Reflective Mirror
Alpha
Adjusts the transparency of the model based on the added image.
It uses grayscale to determine transparency, where white represents opacity and black represents transparency.
For example, if an image with black (RGB 0,0,0) is added, the model will become transparent.
White: Fully opaqueBlack: Fully transparent

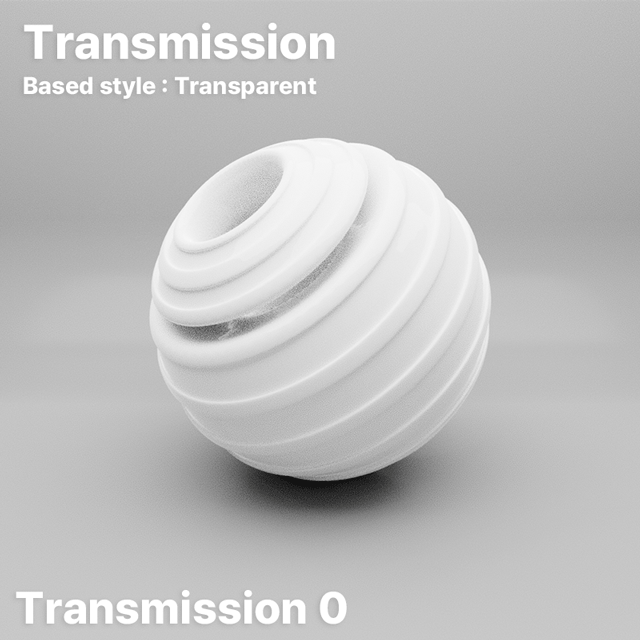
Transmission
Controls the transparency of the object based on the light transmission.
Achieving the maximum value doesn't make the model disappear entirely.
Value 0: Completely opaqueValue 1: Fully transparent
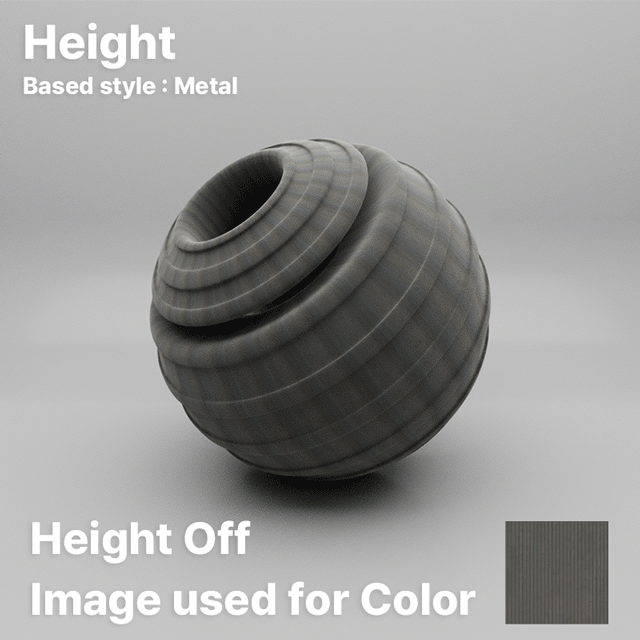
Height (Bump & Normal channels)
Applies a 3D texture to the model's surface. This requires an image with the correct channel information
for the Bump map or Normal map options to function properly.
Bump: Represents surface texture height based on a grayscale image.Normal: Represents detailed surface texture based on normal map image information.Value 0: No differenceValue -5: Minimum (inward protrusion)Value 5: Maximum (outward protrusion)
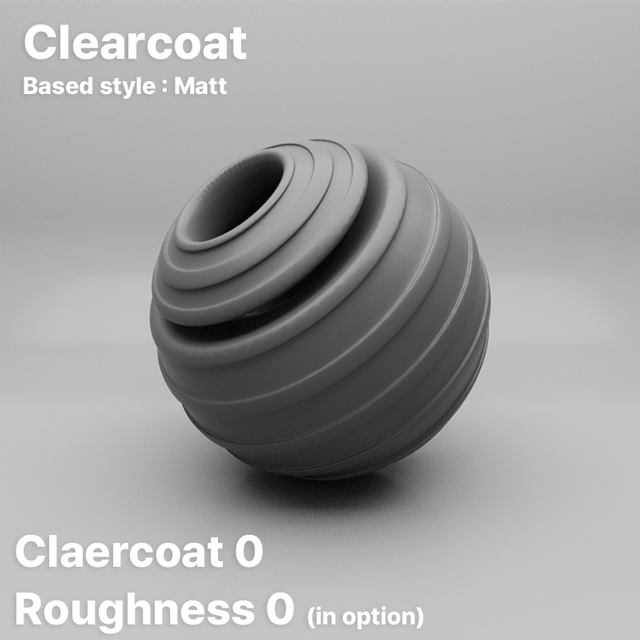
Clearcoat
Adds a thin coating to the model's surface.
Additional settings for roughness and normal map need to be adjusted under Clearcoat.
Value 0: No clearcoat (0%)Value 1: Full clearcoat (100%)Roughness: If this value becomes 1, gloss disappears regardless of clearcoat value, making it imperceptible.Normalmap: Adds a normal map image to simulate surface details.
Emissive
Adds illumination to the model. The higher the value, the stronger the emitted light intensity.
(The radius of light application varies depending on the size of the model.)
Value 0: No light emissionValue 1: Low intensity light emissionValue 100: High intensity light emission

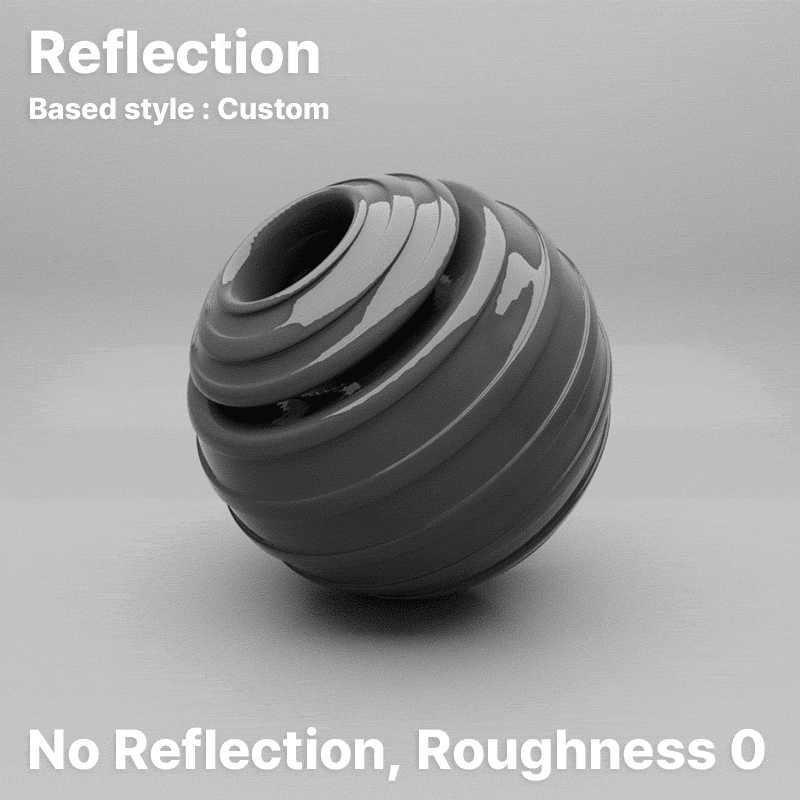
Reflection
Controls the intensity of light reflection on the model's surface.
A value of 0 means no reflection. It affects the appearance based on roughness and metal settings.
Value 0: No reflectionValue 1: Full reflection
Attenuation
Adjusts how much light passing through the model is absorbed or diminished.
The effect varies depending on the color of the attenuation.
Value 0: Low attenuationValue 1: High attenuation

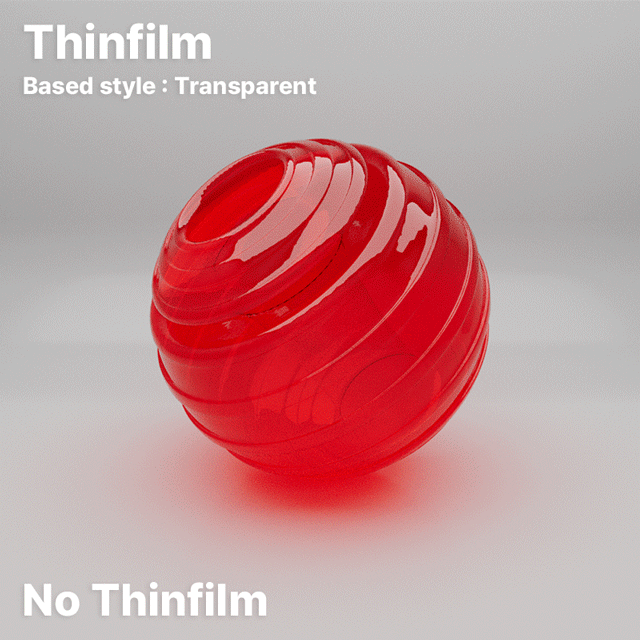
Thinfilm
Adds a thin film to the model's surface, allowing you to represent the color of reflected light.
You need to adjust the Refractive Index and Thickness settings along with the numerical value.
Value 0: No thin film presentValue 1: Full coverage of thin filmRefractive Index 1 ~ 5: Low ~ High refractive
(Adjusts the index of refraction from low to high, affecting how light bends.)Thickness 100 ~ 1000: Change wavelengths of light
(Modifies the thickness of the film, influencing the color of reflected light.)
Thin Wall
Adds an effect that makes the model's surface behave like a thin wall while maintaining its
Transmission and Refractive Index settings.
The appearance varies depending on the Refractive Index and Clearcoat values.
As of the current Surfee version, Light Render provides a more distinct effect compared to Basic Render.
Enable / Disable: Toggle Thin Wall on or off.

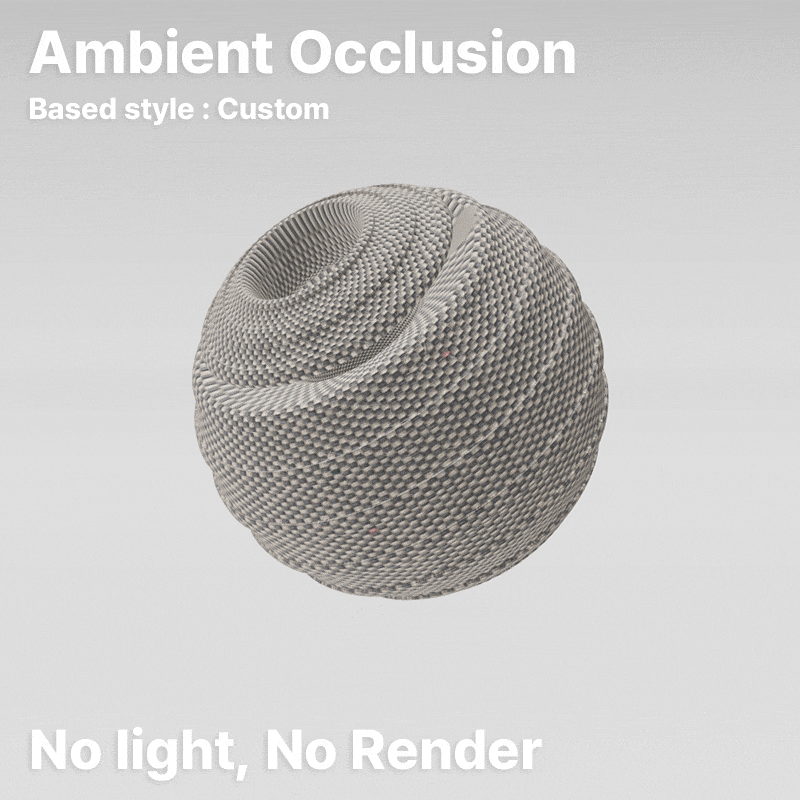
AO (Ambient Occlusion)
Adds an Ambient Occlusion (AO) map to enhance shadow effects, regardless of lighting.
Since Basic Render in Surfee already calculates natural light paths and supports shadows,
AO is mainly recommended for raster mode when rendering is not in use.
As of the current Surfee version, Light Render does not support Ambient Occlusion.
Value 0: No shadowValue 1: Full shadow (100% coverage)